12. Laundry Sachet


Similar to the No Sew Sachet, except this time you don't use glue or heat sensitive adhesives.

MATERIALS
    Fabric scraps (muslin works well, although you can use any tightly woven fabric)
      Another option is to use small muslin draw string bags (usually found at craft stores & just cinch the bag closed after adding the lavender)

    matching thread
    1/2 cup lavender buds for each Sachet (you can find these online or in the wellness section at your health food store.)


INSTRUCTIONS
  1. For each sachet, place 2 matching 5-inch fabric squares back-to-back and sew the edges together on 3 sides.
  2. ll the sachet with about 1/2 cup of lavender. Then sew together the open edges.


These may be thrown into the dryer with your damp clothes. Use up to 6 times before replenishing or replacing.


11. Grain filled Hug (Heating Pad)


Grain-filled heating pads have become quite popular in health food stores, gifts shops and at craft bazaars. But they are often quite costly. Here is a set of simple and thrifty instructions to make your own rice-filled heating pad using scraps of fabric you may already have on hand.

MATERIALS
    1/4 yd. Fabric of your choice, prewashed and preshrunk
    1/4 yd. Muslin
    Iron
    Straight pins
    Thread to match your fabric
    White thread
    Scissors
    Ruler -or- a measuring tape and anything with a straight edge
    1 ½ cups Grain: Rice (not the quick cooking variety), Flax seed, Rolled Oats (not instant oatmeal), or Barley all work well.


INSTRUCTIONS
Part one: The rice bag

  1. From pre-washed cotton muslin, or similar fabric, cut a piece 8" x 22".
  2. Fold the rectangle in half so now it measures 8" x 11" and sew the two longer edges. You can use your serger, if you have one.
  3. Turn right sides out, so you now have a nice little fabric bag. Iron if necessary.
  4. Fill the bag with about 3 C. of grain (rice, barley, whatever). It should be pretty full, about 2/3 filled, but still have some give to it, like a bean bag.
  5. Sew or serge the end of the bag shut. You may want to turn in the ends so there are no raw edges, and use pins to keep the grain from sliding out on the sewing table. Of course, you can also whipstitch the opening closed by hand.


Part Two: The Cover

You can use either cotton flannel, a small towel, or regular quilting cotton for the cover: anything that will be soft and comfortable against the skin. Do not use synthetic fabrics, or fabrics with metallics in them. This is going to be heated in the microwave, remember!

  1. Cut your cover with dimensions one to two inches wider than you cut your grain bag, and three to five inches longer. In this example, that would be 9x25 inches.
  2. Lay the fabric wrong side up on your table, and fold over one end about half an inch to hem it. Fold the opposite end over the same way.
  3. Sew both end hems. (separately, not together)
  4. Lay the cover out again, right side up. Take one hemmed end and fold it back a few inches. In this example we should have 2 inches to fold. Finger press into place. Fold the opposite hemmed end over the previous fold, so the hem meets up with the first folded edge
  5. Sew the two long edges of the cover, being sure to sew through all the layers.
  6. Turn inside out. You should now have something that resembles a fabric sandwich bag, with a flap at one end. When the grain bag is inserted, fold the flap over the open end to close it.
  7. That's it! Remember that the cover can be taken off for cleaning, since the grain inside can't get wet.


Heating Instructions:

    To use, heat your bag in the microwave for about 1-1/2 to 2 minutes. Alternately, put it in a plastic bag and store in the freezer, for those times you need a cold pack.

    The rice retains heat or cold for about 20 minutes. The rice gets a warm, toasty smell when heated. You might notice a slight dampness when the bag is heated, this is just normal moisture in the grain.

    The bags can be re-heated indefinitely, although you can certainly replace the filling when you feel it is no longer holding warmth. I've had some going for over a year now and they are working fine.

    IMPORTANT! Be careful heating your grain pack. Do not heat them more than a minute or two, and be certain the heat is evenly distributed. Overheating the bag can result in severe burns to the skin.


10. Eye Pillow


MATERIALS
    a 7" x 7" square of fabric (if you don't have a ruler, open your checkbook cover and trace around it)
    2/3 cup rice
    5 - 10 drops essential oil, available at health food stores. Rosemary and chamomile are both said to relieve stress, stimulate relaxation, and ease insomnia and headaches; try peppermint to tame a hangover.
    needle and thread
    an envelope of piece of thin cardboard for filling pillow


INSTRUCTIONS
  1. Before you start, add 5 - 10 drops of essential oil to 2/3 cup rice. Let it sit for about 10 minutes. Then mix well to blend, and leave it for about an hour. This allows the rice to absorb the oil, preventing greasy spots on your fabric. If you're making several pillows, you can mix up a big batch of rice and oil at once. Alternately, you can skip the oil and use 1/4 to 1/3 lavender flowers in place of some of the rice.
  2. Fold the square of fabric in half, right sides facing (the opposite side of what you want to show up should be on the outside; you'll turn it inside-out after you sew it up)
  3. Sew along the long side and one short side to form a pouch. If you're sewing by hand, keep your stitches small. Look at the decorative stitching on your jeans for a guideline.
  4. Turn pouch right side-out. You can use a pen with a lid to poke out the corners and make them nice and square.
  5. Fold open edge in about 1/2" on itself; iron. (If you don't have an iron, just skip this step and you'll fold it in when you sew it.
  6. Fill pouch with 2/3 cup scented rice. Slightly roll up the envelope lengthwise, slide it into the pouch, and use it to hold the pouch open and while you fill it with rice.
  7. Sew up open side. If you didn't iron the hem in earlier, then make sure you fold in the unfinished edges. If you're hand sewing, sew several extra stitches at the beginning and the end of the seam to prevent it from unraveling.


Recline, situate pillow over closed eyes, and relax. Eye pillow may be chilled or stored in the freezer for use over the eyes or forehead to help ease a headache or hangover. If fragrance fades, revive with a few drops of essential oil along seam.


9. Envelope Sachet


Use Martha Stewart's heart or butterfly templates to the desired size, or make your own pattern. Graph paper is good for creating a grid design (such as the one shown at top left). Working on a cutting mat or piece of felt, lay your template over an envelope.

With a thick pin, punch holes through the template and envelope until the dotted design is complete.

Fill the envelope with blends of scented ingredients. We like the following combinations: cedar tips, cedar shavings, and lavender; orange tea and dried roses; and lemon verbena, chamomile and dried lemon peel. (Vary the amount depending on the envelope size; we used 1 tablespoon in the gift-card envelope.)

With a glue stick, seal the envelope.

Poke whimsical designs in your paper envelopes, then add your choice of aromatic blends.


8. No Sew Sachets


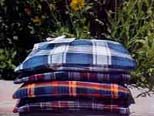
Even kids who don't sew can help fashion a bunch of these fragrant, colorful sachets. It's a great way to use up all your fabric remnants.

MATERIALS:
    Fabric scraps
    Fabric glue
    Potpourri or dried herbs, such as lavender flowers or balsam fir needles


INSTRUCTIONS
  1. For each sachet, place 2 matching 5-inch fabric squares back-to-back and glue the edges together on 3 sides. Spread the glue close to the edges to prevent fraying.
  2. Once the glue is dry, fill the sachet with about 1/2 cup of potpourri. Then glue together the open edges and again let the glue dry.
  3. Arrange the finished sachets in multicolored stacks and tie them together with a festive ribbon or yarn.


7. Spiced Hot Pad


MATERIALS
    5 x 5-inch square each of four different checked fabrics
    Fusible web paper
    5-inch circle of calico fabric for center front circle
    8-inch circle of calico fabric for the back 8-inch circle of extra-loft fleece
    Crushed cinnamon sticks and cloves; needle and thread 3/4 yard of maxi rickrack for binding 1/2 yard of jumbo rickrack for front circle


INSTRUCTIONS
  1. With the right sides facing, stitch the checked fabrics into a four-patch, using a 1/4-inch seam allowance. Center and fuse the 5-inch calico circle to the four-patch.
  2. Layer calico back, fleece (sprinkled with crushed cinnamon sticks and cloves), and pieced circle. Baste the layers together at the edge.
  3. Bind the edge with mini rickrack. Topstitch jumbo rickrack around the small circle.


6. Lady Bug Hot Pad


The ladybug has button spots, while the other hot pad holds crushed cinnamon sticks and cloves for an aromatic bonus.